MASTER BATHROOM RE-VAMP

master bathroom, decor, home, black paint


     Let me begin by saying that I do not enjoy the act of painting. I do, however, enjoy having a completed, comfortable, and fun nest.  To get from A to B…painting must be done!

     In this case, the house was complete except for the small crack den looking master bathroom that I hadn’t gotten around to yet.

     I’d been putting it off this entire year, but my husband asked me to have it completed as a birthday present to him. He did help with the paint roller part, but the trim work was the part I was dreading!

     So I put on my ugly “painter girl” shirt, which actually is an old shirt of his that he wore on our first date to church, and has paint splatters all over it now.  It is my painting uniform. We got it knocked out in our spare time.  


     I’d wanted to add some character to the small area, so I opted for metal decor candle sconces as well as a metal trim piece above the window instead of curtains.

I find the garden tub area to be so much more inviting and soothing with the darker color, which is a black paint named Francesca by Martha Stewart, which is also in the master bedroom, kitchen, and the fire place wall in the living room.

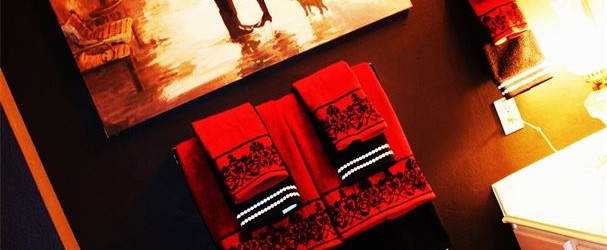
When adding things such as towels or art…I had decided to be thrifty and use what I already owned.  However, one trip to Kirkland’s for some additional pieces was all it took to complete the look.

For example, the crystal hurricane lamp, I already owned, but the silk floral arrangement for the tub area, I purchased. The crystal ball shown below and the metal wall piece I already had.  

The decor towels are mismatched on purpose to try and create an undesigned, old world look. Using the old multi colored runner that I dug out of the back of a closet, also helped to add to the old world look. 


So how much did the bathroom re vamp end up costing me? Just under $250, including paint and painting supplies!

master bathroom revamp, decor, black paint, black bathroom ideas, DIY, blogger, decor

It was my intent to focus on yard projects this summer, as well as a few other DIY type projects (like maybe hitting the gym again)but I am so glad to have this bathroom project complete! Happy Birthday, Ken…your private sanctuary is complete!


-SDS

June 22, 2013

     Let me begin by saying that I do not enjoy the act of painting. I do, however, enjoy having a completed, comfortable, and fun nest.  To get from A to B…painting must be done!
 
     In this case, the house was complete except for the small crack den looking master bathroom that I hadn’t gotten around to yet.
 
     I’d been putting it off this entire year, but my husband asked me to have it completed as a birthday present to him. He did help with the paint roller part, but the trim work was the part I was dreading!
 
bathroom re vamp
     So I put on my ugly “painter girl” shirt, which actually is an old shirt of his that he wore on our first date to church, and has paint splatters all over it now.  It is my painting uniform. We got it knocked out in our spare time.  
  
     I’d wanted to add some character to the small area, so I opted for metal decor candle sconces as well as a metal trim piece above the window instead of curtains.
 
     I find the garden tub area to be so much more inviting and soothing with the darker color, which is a black paint named Francesca by Martha Stewart, which is also in the master bedroom,kitchen, and the fire place wall in the living room.
 
    When adding things such as towels or art…I had decided to be thrifty and use what I already owned.  However, one trip to Kirkland’s for some additional pieces was all it took to complete the look.
 
    For example, the crystal hurricane lamp, I already owned, but the silk floral arrangement for the tub area, I purchased. The crystal ball shown below and the metal wall piece I already had.  
 
     The decor towels are mismatched on purpose to try and create an undesigned, old world look. Using the old multi colored runner that I dug out of the back of a closet, also helped to add to the old world look. 
 

     So how much did the bathroom re vamp end up costing me? Just under $250, including paint and painting supplies!
 
black bathroom decor ideas, Luxor Living and Style, Stephanie Dawn Sjoberg
       It was my intent to focus on yard projects this summer, as well as a few other DIY type projects (like maybe hitting the gym again)but I am so glad to have this bathroom project complete! Happy Birthday, Ken…your private sanctuary is complete!


-SDS
June 22, 2013
Share this post!

A MINT INTERIOR

A MINT INTERIOR

 
     I am so excited to show off somebody else’shard work and creative decor! My sister-in-law has created the most fabulous nest so I crept through the house taking random shots of some of the creative elements that make me want to move in! (Or at the least, go back home to rework some areas in need at my own place!) It’s veryinspiring when you see someone else’s cool spaces. 
 
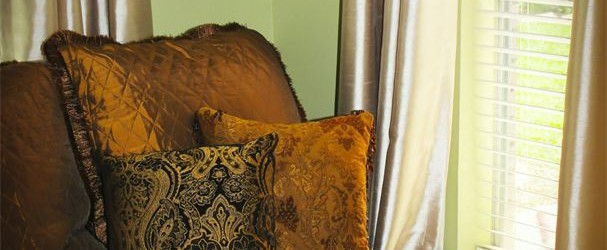
     The wall colors are a soft minty green.  When the browns and neutrals are mixed in, it createswarmth against the crisp and fresh backdrop.
 
     The rhinestone candle buttons and tassels add a designer touch and an extra edge to the look.
 
    Simple and sleek greenery in lit nooks up close to the ceiling or in art nooks help to highlight the architecture.
      The sitting area off to the side of the living room is cozy.  The animal print wall art is great fabric that she created and covered herself, and then edged with decorative roping. 
 
      I must say, when we came over, there was no big plan to do a blog, and she surely didn’t think her bedroom would be seen in Russia or Australia…yet here it is!  Too perfect to be left unseen, I just had to show off this room and the striped walls!  The stripes carry through on every wall and it looks amazing!
     There are a couple of places where there are wall scripts.  This one over the front door adds a warm and real touch.
 
     These are all fabulous home decor ideas and I hope it provides some inspiration!
 
     My latest fashion post also includes more – yes, MORE animal print and you can see it here on Ashley Elizabeth’s site!


-April 2, 2013
-SDS


Share this post!

D-I-Y HOLLYWOOD GLAMOURPUSS VANITY AREA


     I stumbled upon a blogger’s dream!  Yesterday we went to my sister-in-law’s house for Easter.  When I saw her new Hollywood style d-i-y vanity project, I decided I just had to do a blog post on it!

Chanel, Vanity area, decor ideas, Luxor Living, style ideas, bathroom vanity, makeover, Chanel Cosmetics

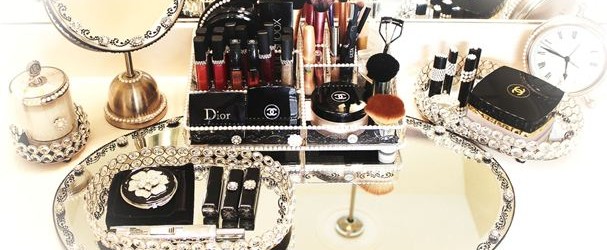
She had recently started adding tiny blings to her lip glosses and lipsticks.  Since bling is addictive, the project grew into adding pearl buttons to an organizer tray.

Chanel, Vanity area, decor ideas, Luxor Living, style ideas, bathroom vanity, makeover, Chanel Cosmetics

When she couldn’t find a nice larger oval tray…she decided to purchase an oval mirror, remove it from the frame it came in and convert it!

     By adding black felt to the bottom, and black and rhinestone pieces to the edges, she created her own, large sized custom vanity tray.

Chanel, Vanity area, decor ideas, Luxor Living, style ideas, bathroom vanity, makeover, Chanel Cosmetics


She then opted to deck out her own vanity mirror because nice embellished ones are impossible to find.  The bling added to the edges of the mirror helps to add to the finished look! I recently used a wall mirror for my perfumania tray, but had never thought of anything this elaborate!

Chanel, Vanity area, decor ideas, Luxor Living, style ideas, bathroom vanity, makeover, Chanel Cosmetics

     The vanity chair was purchased online and helps to complete the glammy special morning spot!  

     I love this vanity area, and it has motivated me to set a deadline of May 1st for my own master bathroom re-vamp!  My bathroom is going to be black and white and this look will fit perfectly with my recent master bedroom re-vamp.

     I snapped a few pictures of other great ideas in her house, and those posts will be coming up later this month!

-SDS
Share this post!

UPDATE: LIVING ROOM ReVamp

UPDATE:

LIVING ROOM RE-VAMP


I promised myself years ago, that I would never become a “storage” person. This is one who pays monthly sums to a facility to store meaningless and depreciating assets for years until the monthly sums finally overthrow the asset’s net worth.

     I, however, recently became that person.  So you can imagine I was thrilled to be able to make room for yet another storage orphan in the living room.

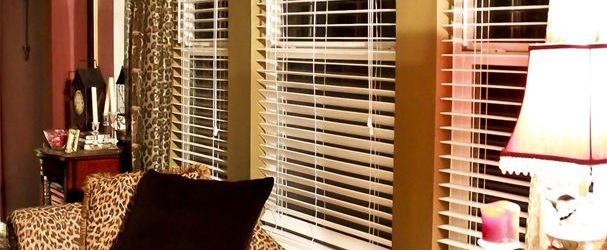
     This animal print chaise lounge is the cheapest piece of furniture I own, but I love it!

I purchased it about 7 years ago, from a friend who was moving and didn’t have room for it.  She asked for $100, which I gladly paid.

     The funny part?  One day, I was sitting on the chaise, and realized I’d never put my hands down into the sofa cushion, to see if anything good had ever fallen in.   I felt something weird….oh, an old sock.  I dug again, felt something like a dead rat body which turned out to be a baggy rolled tight with pot in it!  Quite a bit. Very dry and old.  I told the girl who sold me the sofa a few years earlier and she just laughed.

     The original post of the living room re-vamp is here, if you want to see it, but basically the bench that was in the living room was moved to the master bedroom as part of that re-vamp!

     I love using things I already have, it’s like cheating on the expensive game of life.  Getting ahead.


January  25, 2013

-SDS


Share this post!

MASTER BEDROOM REVAMP – Totally Haute In Black


      Where to begin my tale of the re-vamp?  Well, if you’ve seen any of the other re-vamp posts like the kitchen, dining room, living room, office or guest bathroom or guest bedroom…then you already know that when we got married, I left my perfectly wonderful home (in my mind) to move into his.  I put my things in storage, rented it out and stuffed myself into someone else’s world.


      How romantic! Not so much.  The house was so naked and sterile that it freaked me out when I first met him.  It was too perfect, simple, clean, organized…the soup cans were even lined up too perfectly! (A sign of deep rooted control issues… didn’t you watch Sleeping With the Enemy?!)

Luxor Living and Style, black paint, black bedroom, decor ideas in black, Martha Stewart paint in Francesca, Martha Stewart paint, Luxor Living and Style, Stephanie Sjoberg

 Eventually I realized he was somewhat sane and we were married, so there I was…moving into this white house with white furniture, no warmth, no fun.

     Jazzy and I tiptoed around on eggshells feeling uncomfortable in a new place, but then when we adopted Bella it really helped to break down the need for everything to be perfect because it clearly would never be. (Do you know any chihuahuas ???)


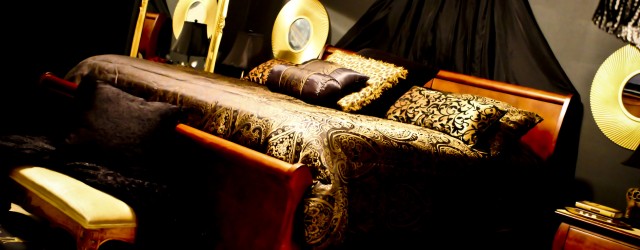
     As far as this bedroom goes, I wanted to be fair and not make it too girly for a grown man, so I decided that black painted walls in Francesca by Martha Stewart would be perfect for us.

     The kitchen is black and there is a black accent wall in the living room, so the black flows well enough with the rest of the house.


     I created a black canopy over the otherwise bland headboard to create the illusion of layering and depth.  I used a wall sconce to hold the fabric.  I may do a D-I-Y post on the canopy in the future if anyone cares!

     I used the bench for the foot of the bed, that was originally in the living room.  We needed it for depth, to dress up the bed, and of course, a place to sit while putting on your Spanx!  The detail in the 30 year old piece adds a high end, old world charm.

Setting the dresser top was simple.  I used an old lead crystal lamp that’s been stored in a closet for almost two years.  The statue belonged to my mom and I used old crystal candlestick holders that were also tucked away unused.  The perfume tray is perfect being out in the open, so I can throw on a scent before running out the door.  I think it looks cute and girly, too!


     The tiny snow scene art collection has been stored in a closet and is something I already owned.  I was actually thinking of using it in our bedroom when I chose the paint color.

     The large gold mirror next to the bed is something I’ve also had for years!


I feel the need to disclose that this bedroom revamp cost less than $400.  We all could decorate fabulously if we had an endless supply of funds with which to squander on luxuries.  Living well on a budget is an art!

    The paint job took 2 cans of paint.  The only new things that were purchased were the lamp shades, the mirrors above each nightstand, the comforter and a few pillows a well as the wall sconce and curtains hanging from it. Everything was less than $400.  

     I really, really loathe the prospect of showing a before photo but I suppose I should for contrast.


      That bedroom made me cringe every time I walked into it.  It had no heart.  It wasn’t cozy or fun.

The new look flows more with the house, it’s fun and cozy and functional and it didn’t cost a lot to transform into a happier space!  

   Dark wood flooring is on my list for next year, for the entire house, however the master bathroom is next on the re-vamp project list for now!

     I love doing the blog posts because it forces me to stick with the time lines and goals I set for myself.  I would be interested in your comments on the project!


-January 22, 2013

SDS

      
Share this post!

MERRY CHRISTMAS AND HAPPY HANUKKAH


     Merry Christmas to everyone!  This has been a busy month with work and family in town and it’s all finally coming to a head.  Today is the day for Christmas and Hanukkah actually occurred December 8 – December 16th this year.
 
     
     With the sad and tragic events in today’s world, it forces us to sit and reflect on what we do have to be grateful for in our imperfect existence.
 
     
     One of the Christmas events my husband went to involved some of his tennis clients.  One older woman gave him a hand stitched snowman ornament that took my breath away and reminded me of how much things had changed. 
 
      I imagined this snow man to have taken her a minimum of 10 hours to sew, so I’d wondered how many others she had made.  I wondered what she was thinking as she sewed his mouth on, as well as the beading on his hat.  The newer generations spend and spend and I found it meant so much more to receive something that took a person 10 hours to create.  He loved it and noticed the intricate details as well, so I wanted to post it here.
 
 
      After attending the candlelight service at our church last night, we came home, shared a hot chocolate and wrapped a few presents. (The ones my husband had wrapped, he’d also taken a big black marker and written the names in huge letters across the front of the packages before I had a chance to stop him. Ugh! Not pretty! However, at least he wrapped them! 
 
    
     Additionally, in these times of political correctness, in which “Happy Holidays” is used in the workplace so as to de-God America and show tolerance to other religions by squashing out our own, let me be perfectly clear.  Merry Christmas and Happy Hanukkah. This is America and it is Christmastime.


-December 25, 2012
-SDS
Share this post!